Iris Release Notes: October 7, 2026 🚀
Last updated: October 7, 2026
This release: we killed the click-through-every-column review ritual.
Review every answer column at once
Remember reviewing a multi-column questionnaire? Five answer columns per question, one pill at a time. Click, read, approve. Click the next pill, read, approve. Then do it again for the next 200 rows. And if you wanted to assign the whole question to a teammate, you had to tick the checkbox and go hunting in the bulk action bar.
You told us: “If I assign a multi-column question, it should assign every column.” Yeah, we heard that. A lot.
What’s new: a layout toggle in your project’s filter bar. Flip it to All answers at once and every column of a question shows up together in one card, each with its own editor, status, confidence and sources. No more pill switcher.
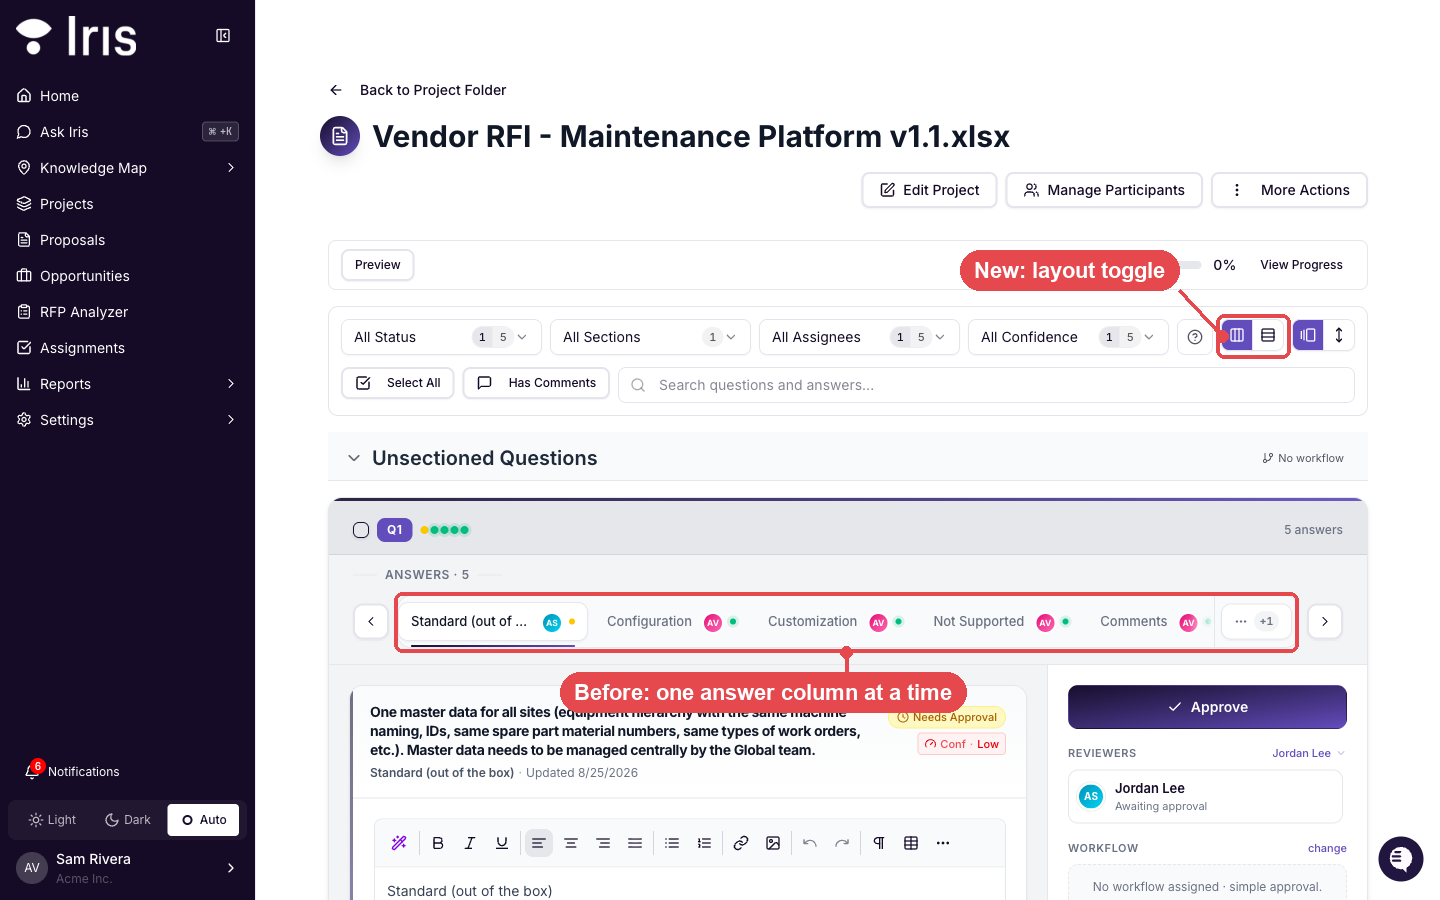
Before: the new toggle sits top-right of the filter bar; answers still switch one pill at a time.
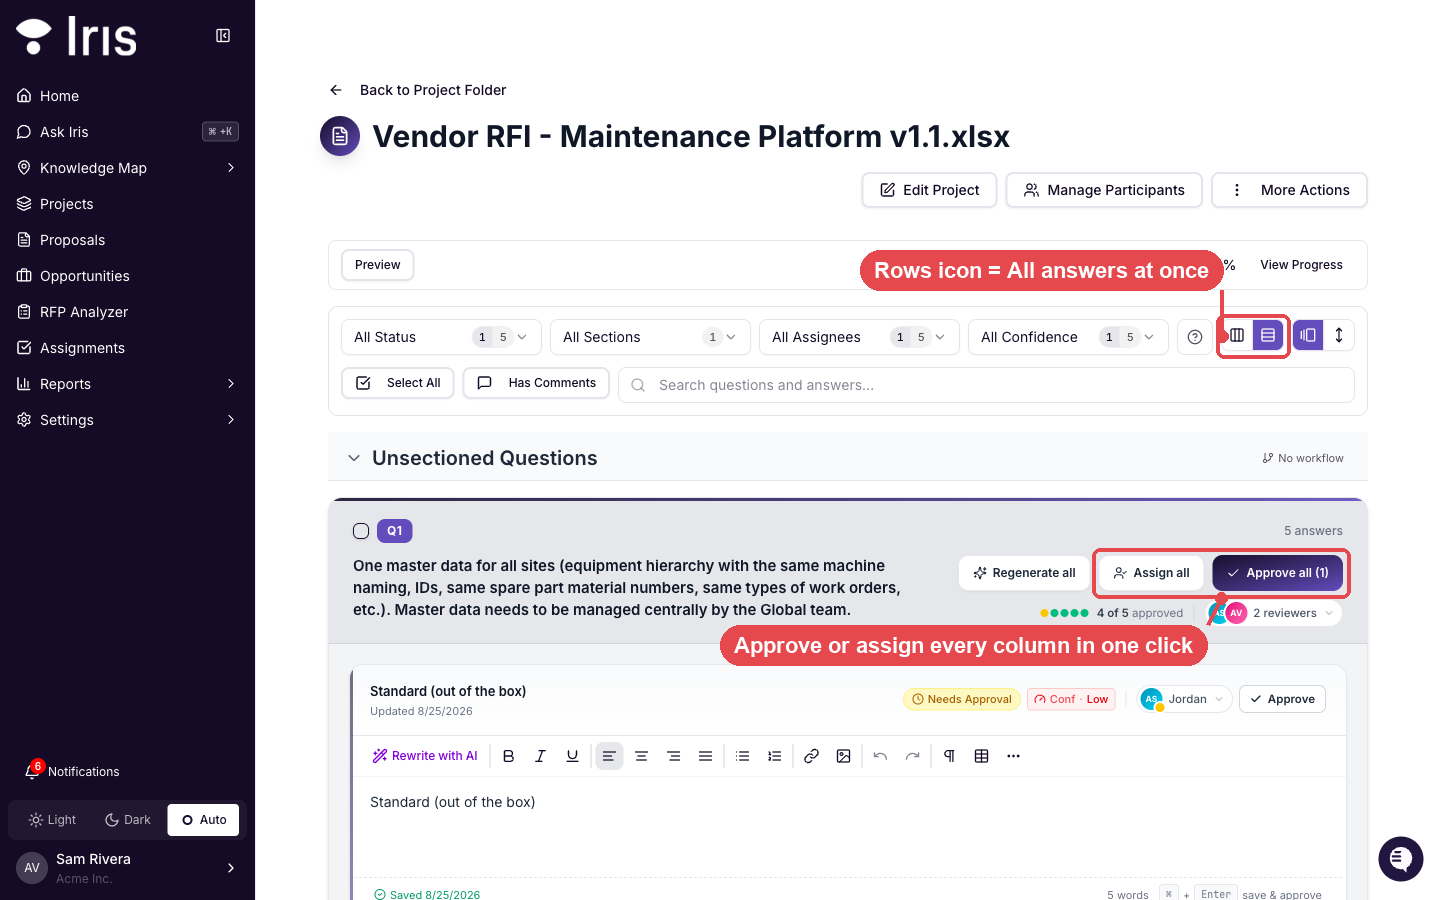
After: click the rows icon and every column stacks in one card, with Assign all and Approve all in the header.
Approve all. Assign all. The question header now carries Approve all and Assign all buttons. One click approves every column on that question, or hands every column to the person or group you pick. They do exactly what ticking the checkbox and using the bulk bar does, just from the question itself.
The question stays with you. Scroll a long card and the question text, the row context and the Approve and Assign buttons stay pinned at the top, so you always know what you are acting on.
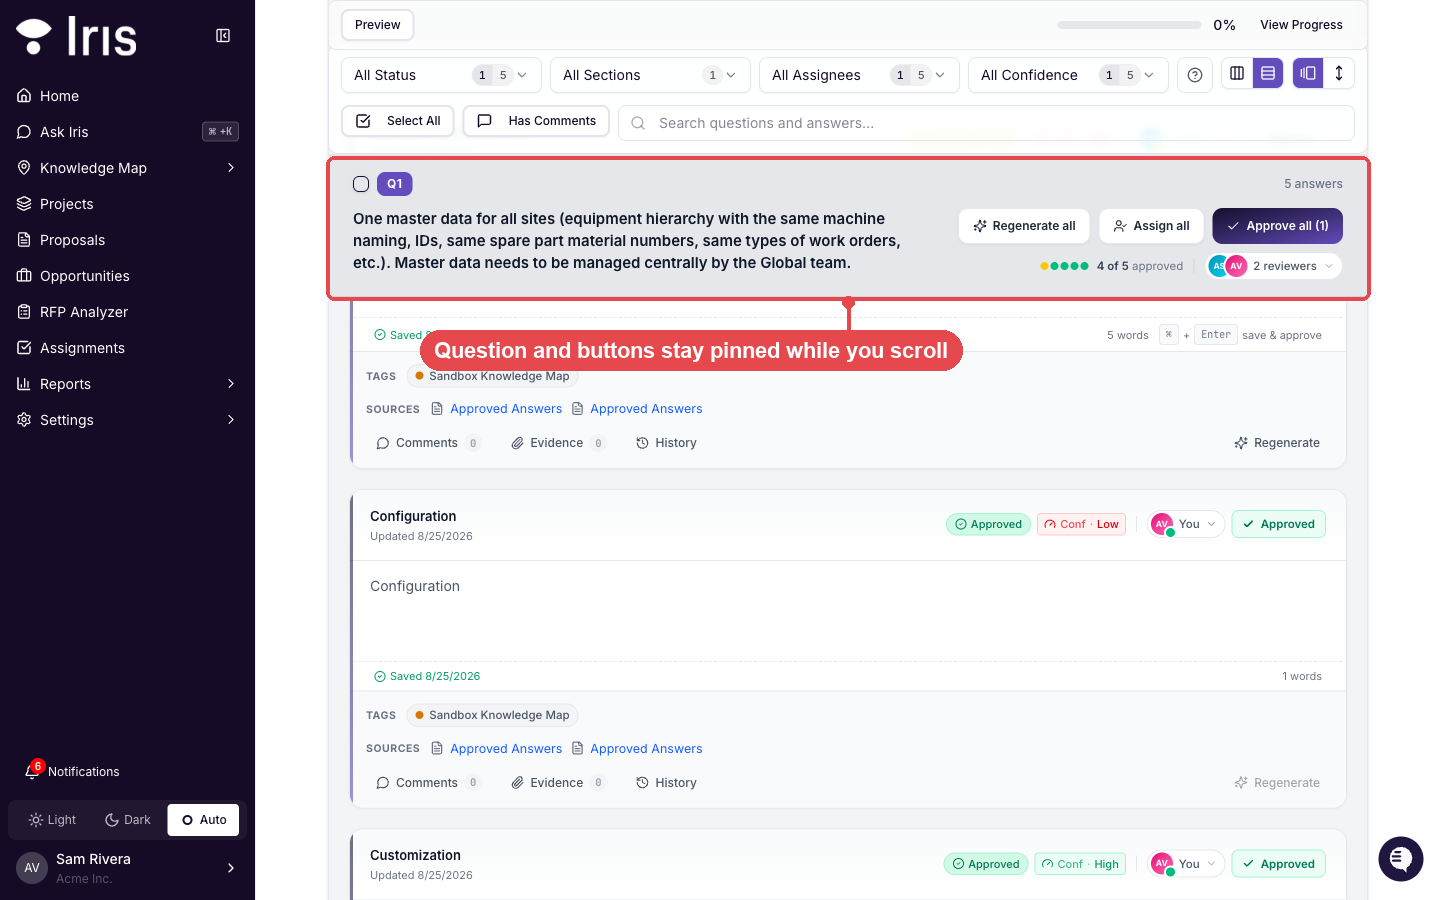
The question header and its buttons stay pinned while the answer columns scroll underneath.
Filters stay honest. Filter down to Needs Approval and a card tells you how many columns the filter is hiding. The buttons act only on what is shown, and Show all columns reveals the rest for that one card without clearing your filter everywhere else.
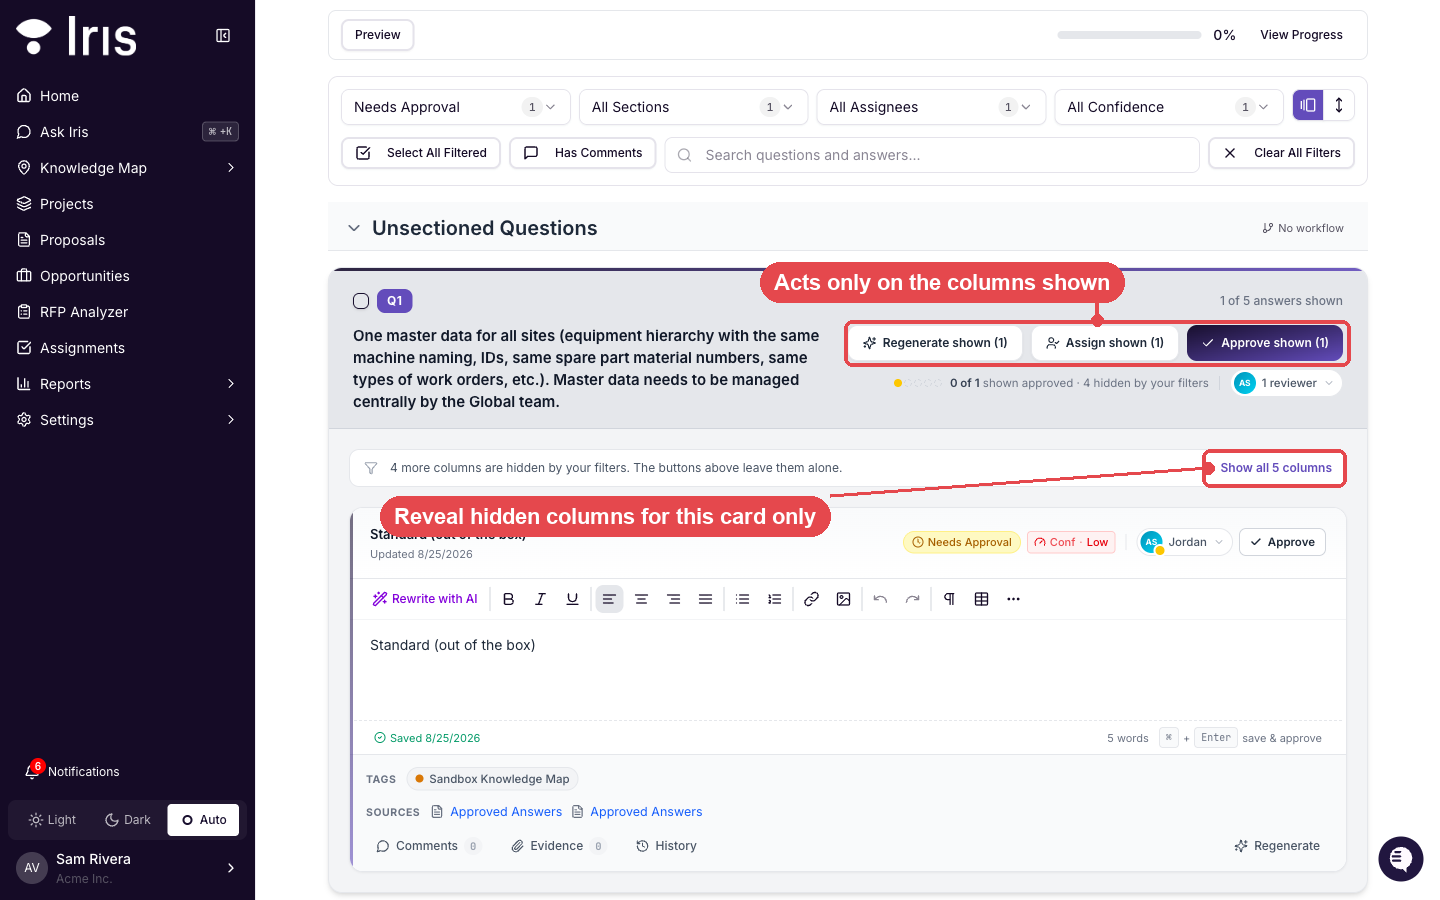
Under a filter the buttons read “Approve shown”, and Show all 5 columns reveals the hidden ones for this card only.
How it works: Open a multi-column project → click the rows icon in the filter bar → review → Approve all. Your choice is remembered across projects.
That five-clicks-per-question review? Now it is one scroll and one click.
Filter your Approved Answer Library by Project Preset
Your Project Presets already bundle tags together. Pick a preset on a new project and all of its tags come along. But in the Approved Answer Library you still had to add those same tags one by one, every time, just to see the answers you use for that kind of deal.
One team switching to Iris from another tool told us they could pick one tag there and see everything related. They wanted the same thing here. So we built it.
What’s new: an All Presets filter in the library toolbar. Pick a preset and every tag in it is selected for you, with the matching answers shown right away. Untick a single tag underneath if you want to narrow further.
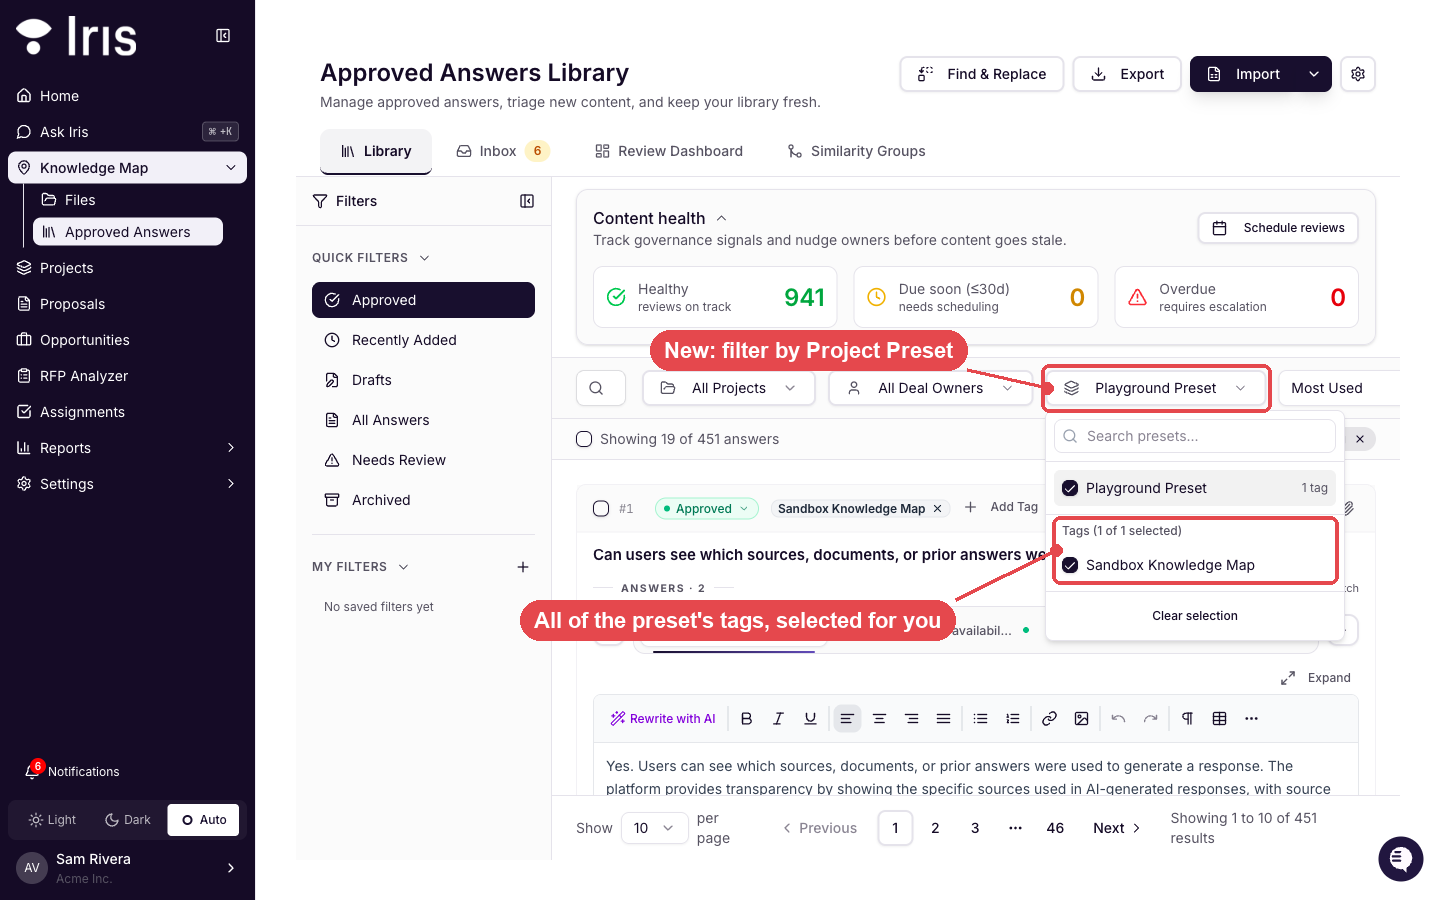
The new Presets filter in the library toolbar. Selecting a preset selects all of its tags.
How it works: Open the Approved Answers Library → click All Presets → pick a preset → done.
Six tags, six clicks, every time? Now it is one.
Find the answers that still need a real tag
Every answer in your library carries the Approved Answers tag. Useful for finding approved content, useless for spotting the answers nobody has filed under a product, region or deal type yet. Those untagged answers hide in plain sight, and cleaning them up meant scrolling the whole library.
What’s new: two system filters in the saved-filter dialog. Only answers whose only tag is Approved Answers shows the answers that have never been given a tag of their own. Only answers with no tags catches the rest. Save either one, or apply it without saving, and share it with your whole organization.
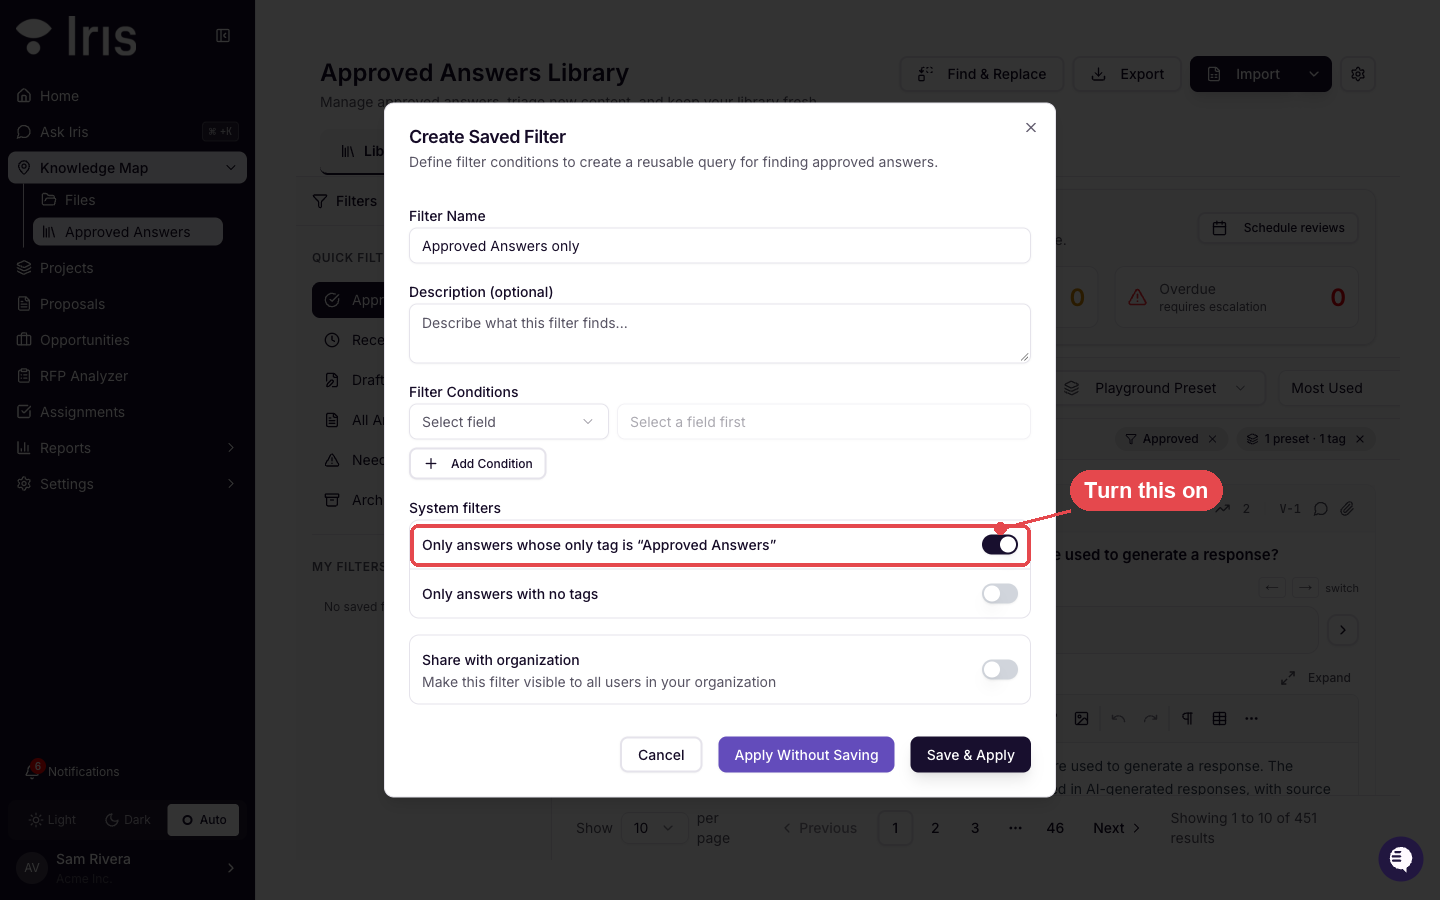
My Filters → + opens this dialog. Turn on the first system filter to see answers that only carry the Approved Answers tag.
One more thing: when you save an answer from Ask Iris, the Approved Answers tag no longer shows up in the tag picker. It is always applied, so there is nothing to choose.
How it works: Approved Answers Library → My Filters → + → flip the switch → Save & Apply.
The untagged backlog you could not see? Now it is one saved filter.
Save approved answers straight from Claude
If you have connected Claude to Iris, you could already search your library and add files to your Knowledge Map. But a great answer you worked out in a Claude conversation had nowhere to go. You copied it, opened Iris, pasted it, tagged it. Every time.
What’s new: Claude can now add an approved answer to your Approved Answer Library directly. It runs as you: your permissions, your tag access, your organization. No shared API key, nothing written that you could not write yourself. Answers saved this way show their source in the library, so you can always tell where they came from.
How it works: Ask Claude to save the question and answer to Iris → it lands in your library, tagged and ready to reuse.
Also in this release
Iris knows which sources are current. When generating answers, Iris now sees each document’s approval and expiration dates alongside today’s date. Current sources rank first. Expired content is still used when nothing newer covers the question, so you get the freshest answer available instead of last year’s “coming soon”.
Word exports keep your source document. Exporting a project that includes cited files or attachments now gives you the rendered source document, not a generic question-and-answer list.
Login works however you typed your email. Accounts whose username contains a capital letter can sign in and reset their password again.
Regenerated answers stay put. Regenerate an answer from the Missing Info view and it stays on screen until you change filters, with a note that it no longer matches. No more wondering whether the regeneration worked.
Excel imports keep their formatting. Questions imported from Excel in the staging view no longer pick up stray strikethrough, bold, underline or italics.
Questions? Reach out to your FDE or email support@heyiris.ai.